|
<< Click to Display Table of Contents > Parameter Finder |
  
|
|
<< Click to Display Table of Contents > Parameter Finder |
|
|
Check out our SAMLight Video Tutorial regarding the Parameter Finder: |
|---|
The Parameter Finder is a tool that helps to optimize pen parameters and the hatch parameters. It is structured as a wizard which guides the user through the different steps of:
1. Define the pen or the hatch which should be optimized, the grid and the entity to be used for testing
2. Choose the "X Parameter" to be varied in horizontal direction
3. Choose the "Y Parameter" to be varied in vertical direction
4. Mark, selection of the best result, fine tuning.
When clicking on the icon of the Parameter Finder, the following dialog appears:
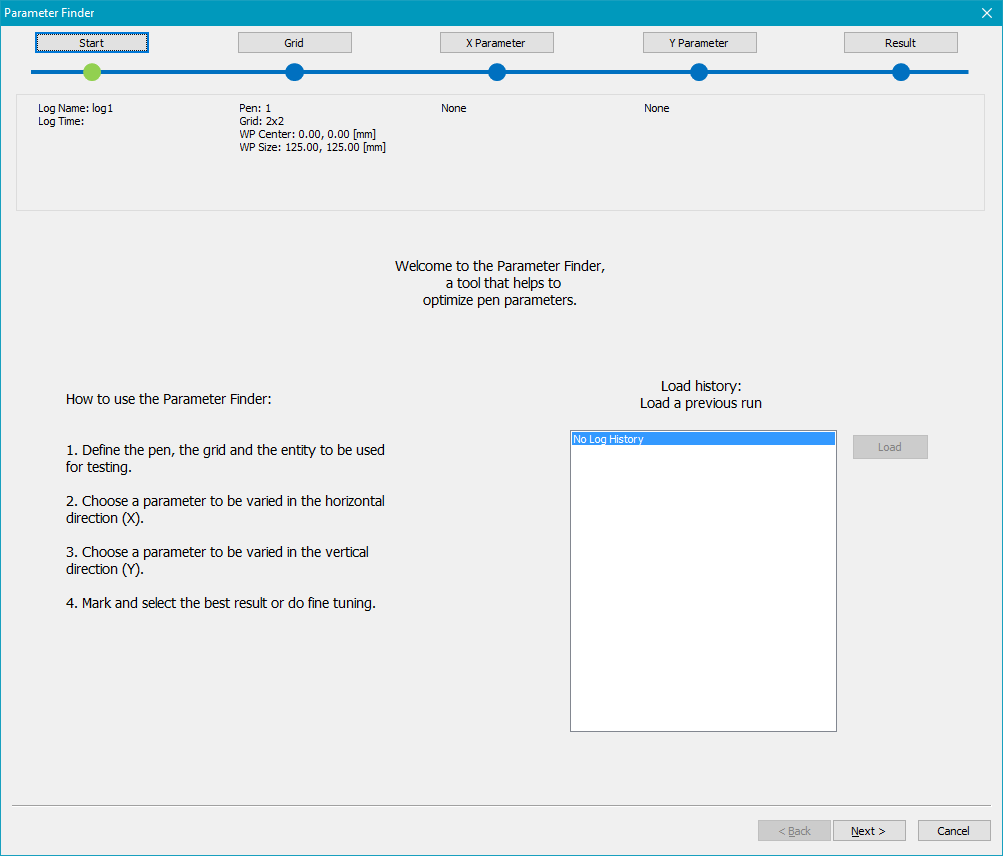
Figure 178: Parameter Finder Dialog - Start
Navigation is possible either with the buttons "Next" and "Back" or by clicking directly on the button representing the desired page in the navigation line at the top.
On the blue line, the current page is highlighted in green.
For each button of the navigation line, a summary of the currently applied values is given in the box underneath.
For each marking, a log is created which can be used to restore the parameters used for that particular marking by clicking on the load button.
1. Define the pen or the hatch which should be optimized, the grid and the entity to be used for testing
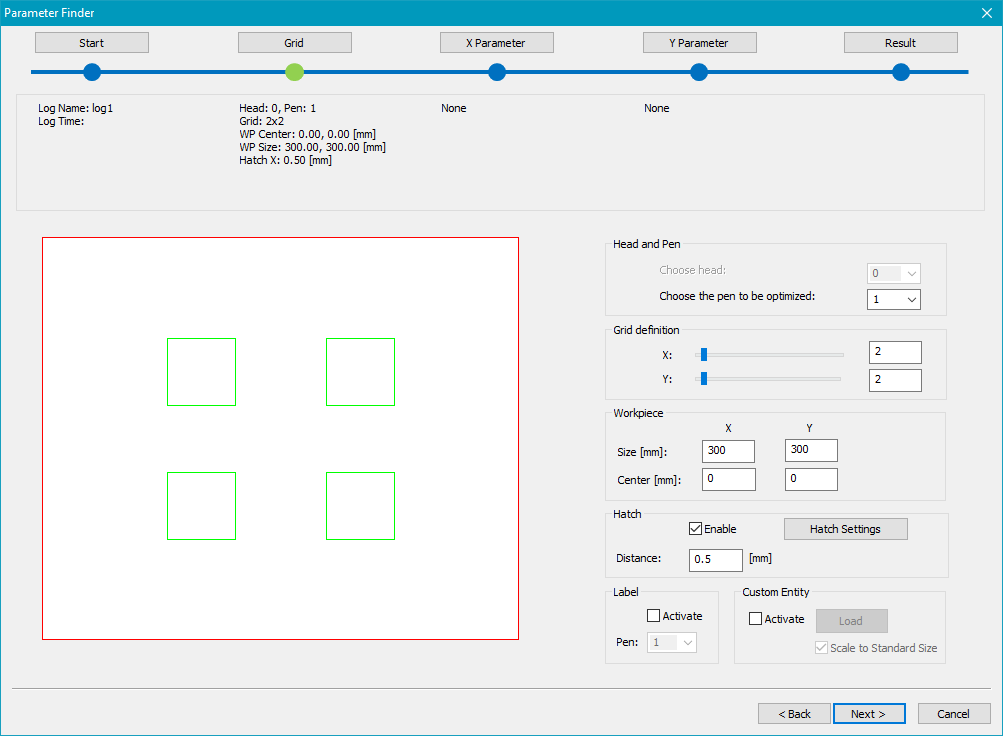
Figure 179: Parameter Finder Dialog - Grid
Preview: A preview is shown on the left half of the dialog. Changes made in the parameter definition will be automatically displayed in the preview.
Pen: Use the drop down menu to choose the pen which should be optimized. The parameter values set in this pen will be taken as start values for the parameters to be chosen on the pages X Parameter and Y Parameter of the Parameter Finder.
Grid definition: Define the total amount of entities in X and in Y direction.
Workpiece: Define the size and center of the workpiece. This is the area on which the entities of the grid will be equally distributed automatically.
Hatch: Activate a hatch. If activated the distance between individual hatch lines can be adjusted.
Hatch Settings: In this window more hatch settings can be adjusted like the hatch settings on the property page.
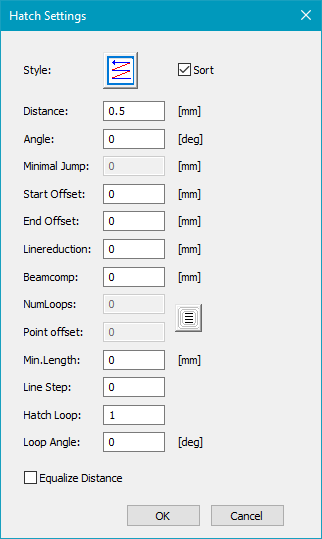
Figure 180: Parameter Finder Dialog - Hatch Settings
Label: Activate a label to be marked for each single entity. This label can be marked with a pen different than the pen which was chosen for optimization before.
Custom Entity: The default entity is a square which is scaled automatically with the grid size. To use an entity different than a simple square, the functionality "Custom Entity" can be used. When activated, a job can be loaded. The entities in this job will then be taken at each entry of the grid. Scaling of the job is possible to make sure it fits within the workpiece. The preview always shows rectangles as a representation of each entity or job.
2. Choose the "X Parameter" to be varied in horizontal direction
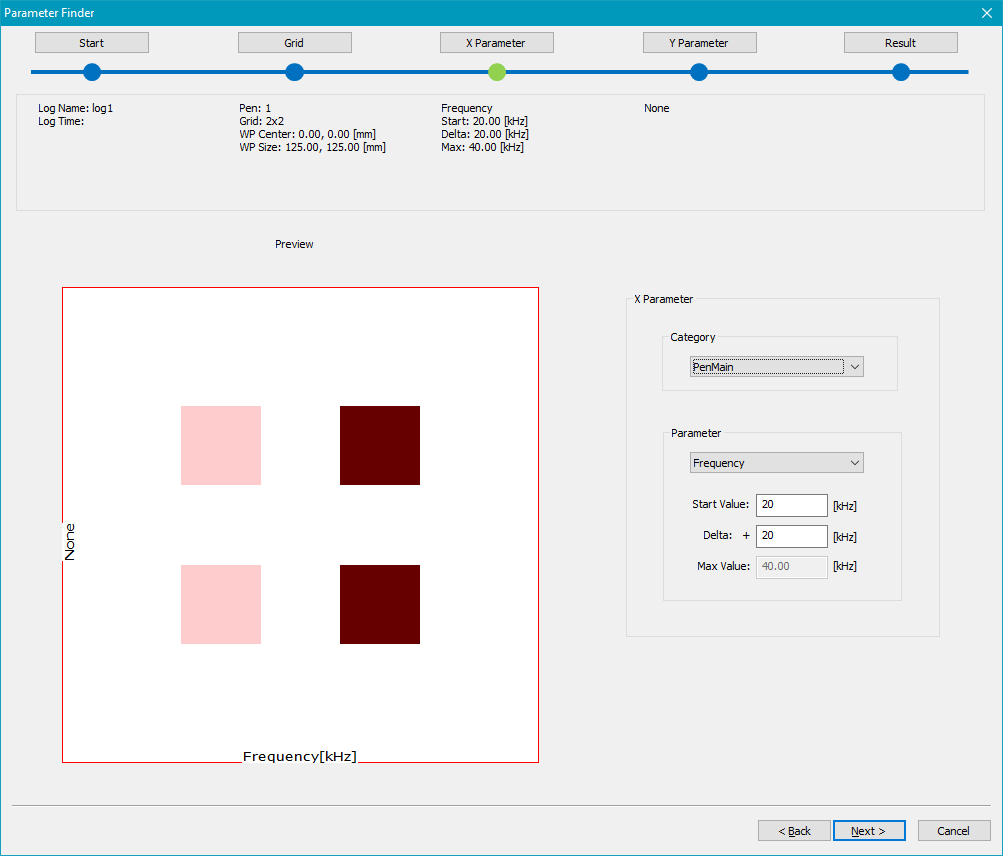
Figure 181: Parameter Finder Dialog - X Parameter
Preview: The color gradient indicates the variation of the parameter chosen in X direction. A label is given on the bottom according to the parameter chosen.
X Parameter: Specify the parameter which should be varied in horizontal direction.
Category: Choose a category from the drop down menu. Parameters are categorized according to the pen property pages and the hatch property page.
Parameter: Choose a parameter from the drop down menu. Per default, the current value of this parameter given in the pen is taken as start value. The start value and the delta (difference between two entities in X direction) can be adjusted. The resulting maximal value is calculated automatically.
3. Choose the "Y Parameter" to be varied in vertical direction
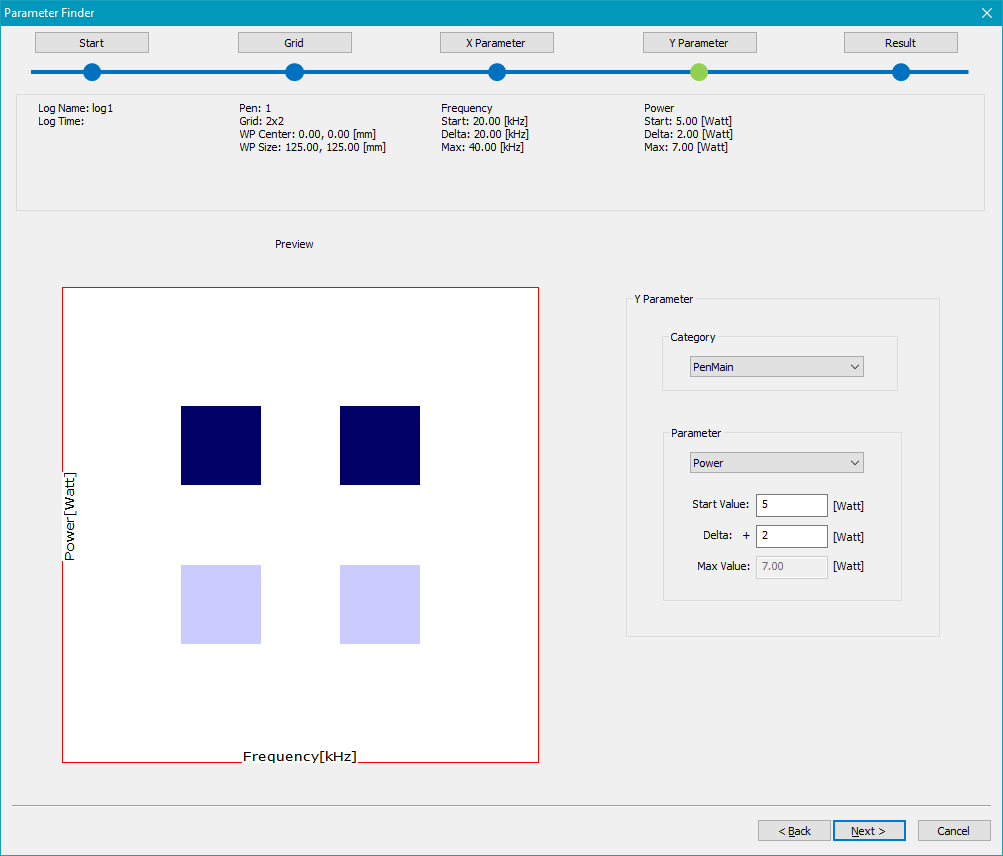
Figure 182: Parameter Finder Dialog - Y Parameter
Preview: The color gradient indicates the variation of the parameter chosen in Y direction. A label is given on the bottom according to the parameter chosen.
Y Parameter: Specify the parameter which should be varied in vertical direction.
Category: Choose a category from the drop down menu. Parameters are categorized according to the pen property pages and the hatch property page.
Parameter: Choose a parameter from the drop down menu. Per default, the current value of this parameter given in the pen is taken as start value. The start value and the delta (difference between two entities in Y direction) can be adjusted. The resulting maximal value is calculated automatically.
4. Mark, selection of the best result, fine tuning
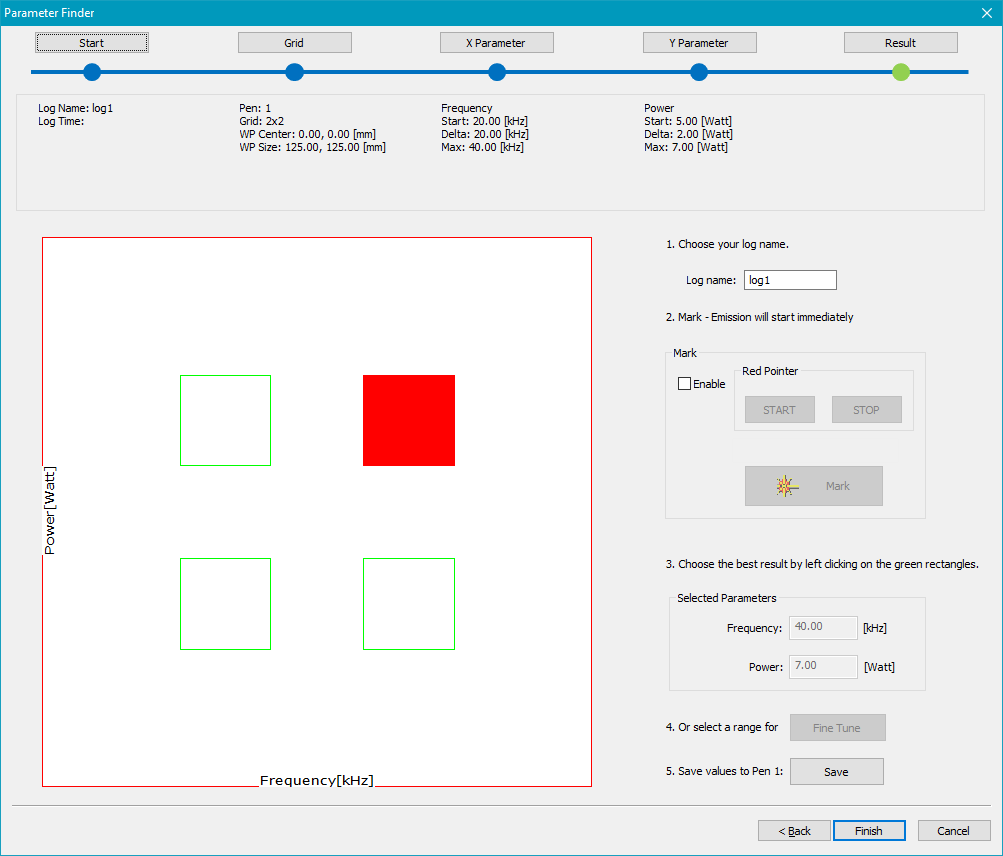
Figure 183: Parameter Finder Dialog - Result
Preview: On this page, the preview is used for selection of the best result (left click, red) or selection of an area for fine tuning (right clicking, blue).
1. Choose a log name: For each mark, a log is created which can be loaded on the Start page of the Parameter Finder. Specify the name of this log here.
2. Mark - Emission will start immediately: When enabled, the red pointer can be used with the buttons Start and Stop. Clicking on the mark button will start the marking.
3. Choose the best result by left clicking on the green rectangle: After having marked, the best result in reality can be detected and chosen by left clicking on the respective rectangle in the preview (will be highlighted in red). The exact parameter values will be given in the fields of "Selected Parameters". To save the chosen values to the pen, click on the Save button in point 5.
|
It is not possible to save the chosen parameters for the hatch. The selected parameters must be entered manually in the hatch property page. |
|---|
4. Or select a range for: If no best result can be identified, an area can be chosen for fine tuning. The area can either be chosen by right clicking on several rectangles or by dragging with pressed left mouse button (area will be highlighted in blue).
5. Save values to Pen x: If a best result has been chosen, the parameter values can be stored to the pen chosen on the Grid page. It is not possible to save the hatch parameters to the hatch property page.
|
Mark Pre-/Postprocessing feature is available for Parameter Finder. |
|---|
