|
<< Click to Display Table of Contents > Sc_Setup |
  
|
|
<< Click to Display Table of Contents > Sc_Setup |
|
In this step we will configure your laser settings. Please open the sc_setup.exe. It is located here: <SCAPS>\tools\sc_setup.exe.
After launching the program you are asked to enter the license key.
Usually you should have received a PDF from us with the license code. The format is 8 blocks, each having 4 characters. Copy the whole license key and enter it within the first field.
Then press OK / Enter twice. The key will be entered automatically in each box and the program will start.
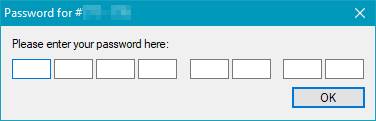
Figure 12: Password Dialog
Choose your language using the Resource tab. 3 languages are delivered with the installer: german, english, and chinese.
Note that there is also the possibility to create your own translation. This process can be looked up in our manual and is shown at our youtube channel.
The next step is to open the Hardware Settings.
First choose the SAMLight radio button, set the HeadCount to 1 and choose your device in the drop down menu.
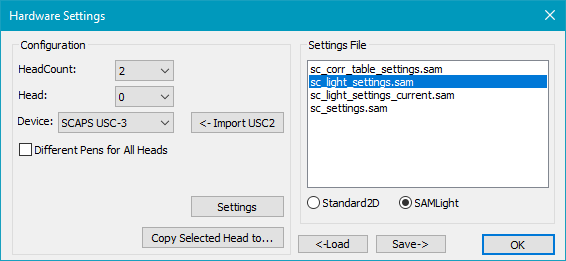
Figure 13: Sc_Setup → Hardware Settings
After that press the Settings button.
Here you can define your optical field settings specified by your scan head. You will also have the option to set up the parameters in SAMLight later.
Some laser sources have a special Laser Type and Version number required since they got their own implementation.
Some of them are given in our laser connection manuals that are available online.
If you are not sure what to enter here, please send us a request via info@scaps.com with your laser source manual attached.
The most common choice is 0-0 if the laser has no special requirements, but in the case of uncertainties please ask our technical support team.
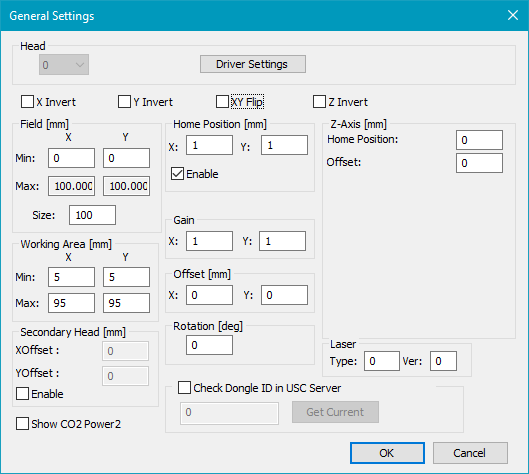
Figure 14: Sc_Setup → Hardware Settings → Settings
Once the settings are entered, continue with the Driver Settings.
Here the global laser signal requirements will be set up. Some laser signals can be inverted and the laser port used for the laser power can be chosen.
This dialog looks different for the USC-1 since its configuration is mainly done via hardware jumpers. This information is linked in the USC-1 chapter.
Correction:
Use this option to set the path of the correction file. Please ask your scan head supplier for this file.
If your scan head supplier is not able to provide you this file, you can use a default file delivered with the installer which is located at: <SCAPS>\sam2d\usc1\cor_neutral.ucf.
Enter this path here:
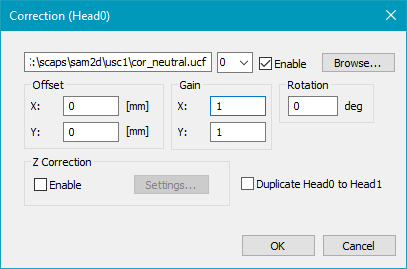
Figure 15: Sc_Setup → Hardware Settings → Settings → Correction
The following are various thoughts about what could be the right setting for your laser source. Note that this information does not fit each source.
In the case of uncertainties please ask our technical support team!
Main settings:
•Laser Mode: Choose the corresponding mode according to the source. If you use a custom laser type and version number, the last radio button usually has to be chosen. For all simple lasers keep it as default on YAG. If you have a laser that sets the power via the width of the frequency signal, then choose CO2.
•Laser Signals LaserGate, LaserA, LaserB: Their default state is active LOW. You can invert this behavior here if needed.
•Opto_Out_0: Mark in Progress signal of the USC-card. Its default state is active LOW. You can invert this behavior here if needed.
•Opto_Out_2: Redpointer signal of the USC-card. Its default state is active LOW. You can invert this behavior here if needed.
•Laserport: Choose the 8Bit digital laser port or the DAC_A for the analog voltage power control. Regarding the DAC please choose the dropdown menu for the voltage limit.
•Store: After you finished the configuration, please press Store. This will save the settings on the USC-card for them to be present after a reboot.
The following dialog is only valid for the USC-2/-3/-4!
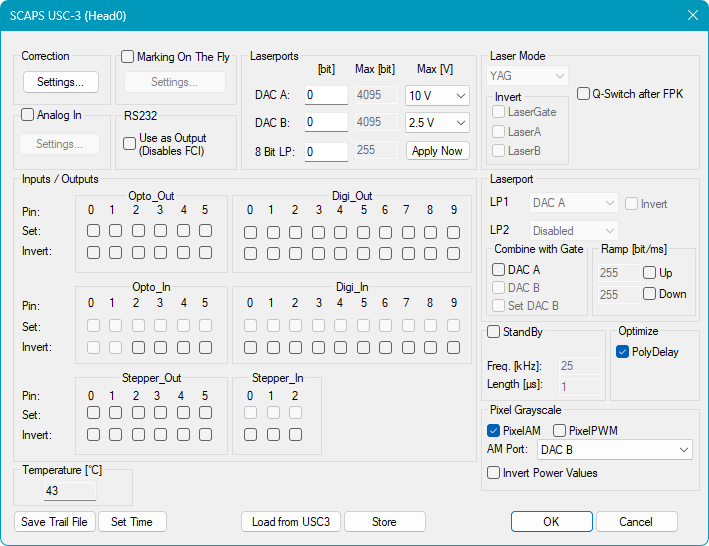
Figure 16: Sc_Setup → Hardware Settings → Settings → Driver Settings
After you completed these steps in the sc_setup.exe and can close the dialogs one after the other and save the settings as well before closing the program.
Now you are ready to start SAMLight and continue in the next chapter.