|
<< Click to Display Table of Contents > SAMLight |
  
|
|
<< Click to Display Table of Contents > SAMLight |
|
After finishing the setup you can now start SAMLight.
The program can be opened via the windows search or by using this path: <SCAPS>\sam2d\samlight\sam_light.exe.
SAMLight has the following sections shown in the image below:
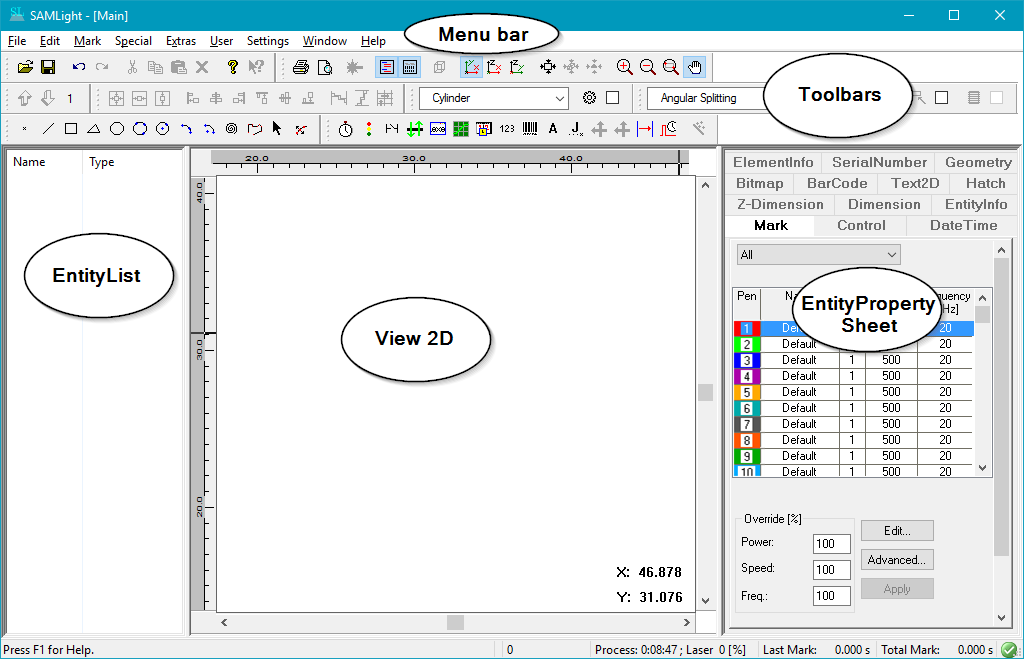
Figure 17: SAMLight Main View
Some laser sources require a job execution delay to be set.
This delay can be specified at: Settings → System → IO. The delay has to be given in [ms].
Regarding the red pointer different presets might be needed.
This can also be specified at: Settings → System → IO. Choose the option that Opto_Out_2 is used. For some laser sources the option Pointer always on is also needed.
After you create an entity in the job, you get access to the mark dialog via this button in the toolbar: 
Enter the Advanced... page. Please make sure that the checkbox SwitchOffDuringMark is unchecked.
According to your laser, a power mapping between set bit value and expected output power in [W] is required.
The Power Map can be opened via Entity Property Sheet → Mark → Advanced... → Power Map.
Here you can enter the maximum output power in [W] of the laser source. You can also manually assign the wanted bit value.
The non-linearities of the laser can be compensated here as well.
For some laser sources the minimal level has to be adjusted. Modify the lowest bit value and linearize the power map.
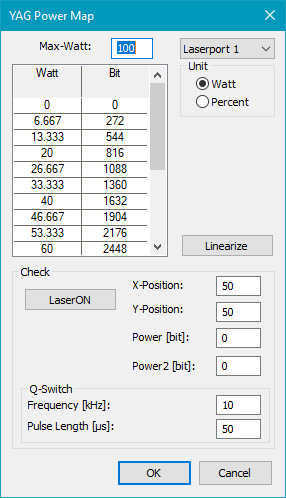
Figure 18: Entity Property Sheet → Mark → Advanced... → Power Map
Some parameter ranges can be limited so that only useful values can be entered.
This is done via the Min/Max Dialog which can be opened via Settings → System → Optic → Min/Max.
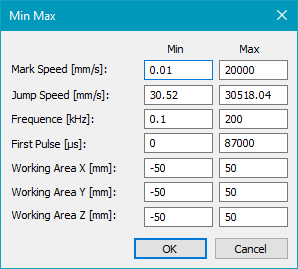
Figure 19: Settings → System → Optic → Min/Max
You are now ready to execute your first marking. Please make sure you are in focus for good results.
The distance between the target and the second mirror of the scan head should be set physically as specified by your supplier.
Afterwards you can create your first entity and apply a pen from the Entity Property Sheet. Do a double-click on the pen to modify the parameters.
After this initial setup you should now be able to run your first marking.
Please note that further adjustments will likely be necessary later. The required information is given in our SAMLight manual which is available online and as a PDF.
Further interesting topics might be: