|
<< Click to Display Table of Contents > LAN Connection |
  
|
|
<< Click to Display Table of Contents > LAN Connection |
|
The following process guides through the basic steps to test the Ethernet connection.
A USC-2/-3 card can be connected via USB and Ethernet, since those cards have an Ethernet port. Based on this, a USC-2/-3 has an IP-address. In the case that there are connection issues, the LAN connection can be tested with the console. Therefore, it is required to know the current IP-address of the USC. This IP-address is set per default equal to:
•USC-2: 192.168.1.2
•USC-3: 192.168.1.3
This IP-address can be changed by the user as described in the SAMLight manual at the sc_usc_server.exe → LAN.
If you change the IP-address and are not sure which IP-address has been chosen you can set the IP-address back to the default values by removing jumper 2 (JP2) next to the Ethernet port. The following pictures show the possible results.
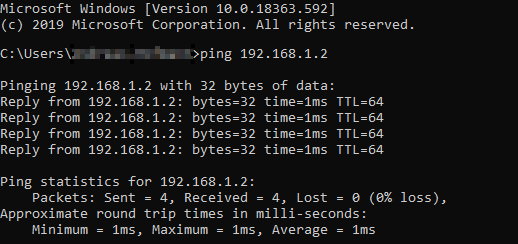
Figure 45: USC-2 Ethernet ping succesfull.
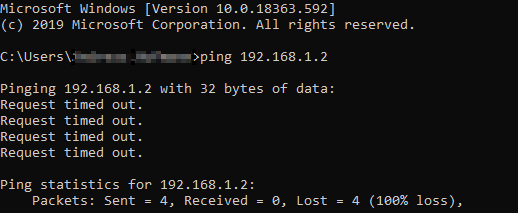
Figure 46: USC-2 Ethernet ping failed.
If the Ethernet ping fails you can try connect the card in the system LAN-settings with your computer. In this case you have to know the IP-address. Please follow the following image to connect the card via Ethernet.
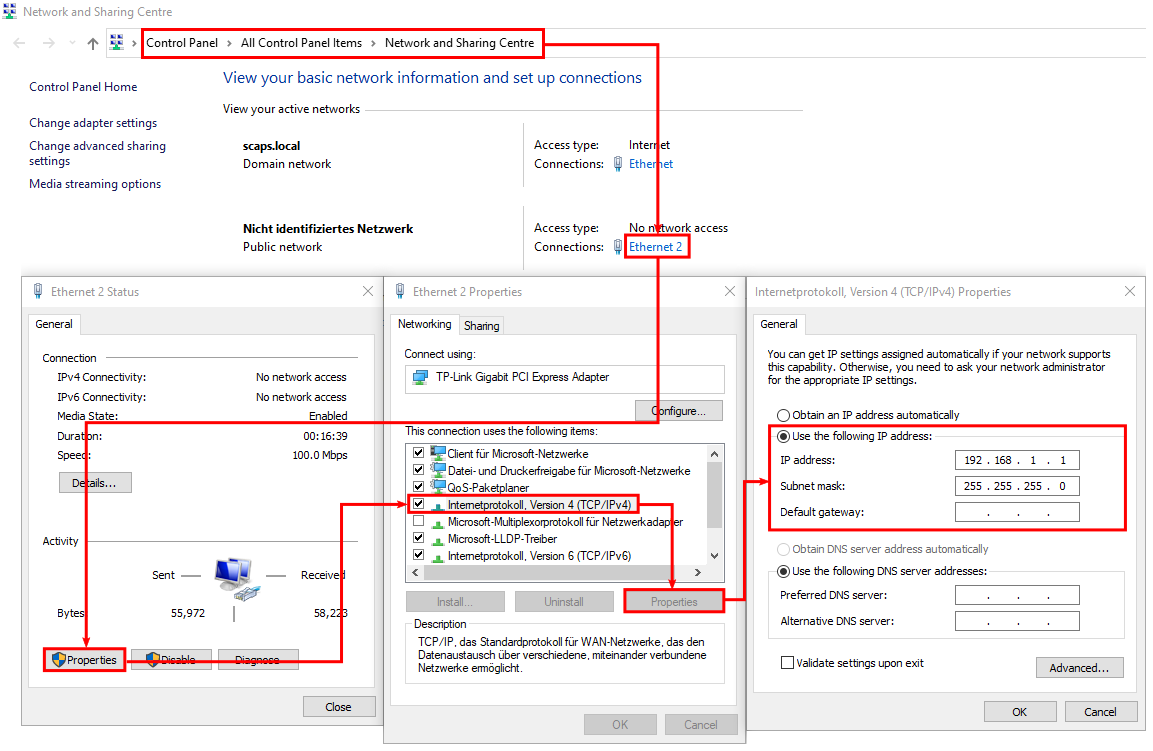
Figure 47: System Ethernet settings.
How to connect the USC-2/3 via LAN with/without an USB connection:
To change the Ethernet parameters of the USC-2/3, the card must be recognized in the USC server. This can be done either via USB or Ethernet with the current Ethernet parameters. When using Ethernet, the IP address of the USC card must be set at one of the connect strings in <SCAPS>/system/sc_usc.cfg. Before editing the sc_usc.cfg the USC server must be closed, which you should check with the Windows Task Manager.