|
<< Click to Display Table of Contents > Backup SD Card Image |
  
|
|
<< Click to Display Table of Contents > Backup SD Card Image |
|
Backup SD card image:
•Unmount the SD card from the USC-3 / -4.
•Mount the SD card into the PC (SD card reader).
•Download an image tool for SD cards like this one: https://sourceforge.net/projects/win32diskimager/files/latest/download
•Read the image to create an backup image file with the image tool.
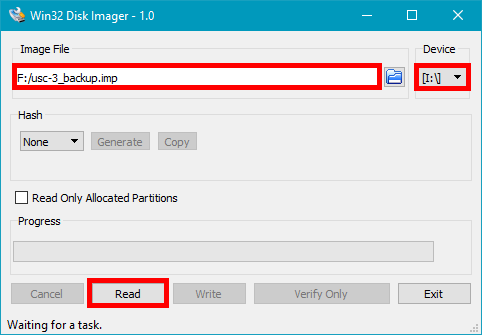
Figure 1: Read SD image
Write SD card image:
•Download the respective SD card image suitable for your USC-card: https://download.scaps.com/downloads/usc3-sd-images/
•Unzip the SD card image. The *.img file is needed.
•Unmount the SD card from the USC-card.
•Mount the SD card into the PC (SD card reader).
•Download an image tool for SD cards like this one: https://sourceforge.net/projects/win32diskimager/files/latest/download
•Write the USC-card image with the image tool on the SD card.
•Safely eject (unmount) the SD card from the PC before you unplug it. (important!)
•Mount the SD card into the USC-card.
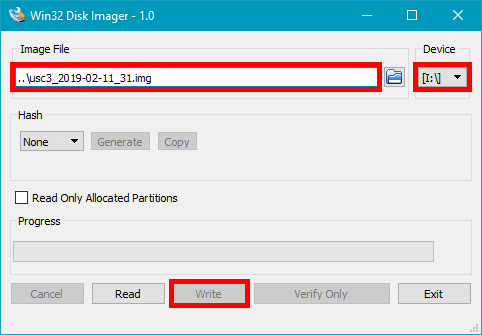
Figure 2: Write SD image
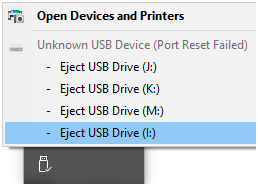
Figure 3: Safely eject the SD card from the PC before you unplug it.
Steps after that:
•Connect USC-card via USB and Ethernet and power the USC-card card.
•Update USC firmware. (USC server → Flash → UpdateSystem)
•Set up the USC-card IP configuration. (USC server → LAN)
•Store SAMLight settings to USC-card. (SAMLight → Settings → System → Optic → Advanced → Store)